I can't tell you how excited I am for these girls to start laying. We now have 10 hens that are four months old and 3 hens that are a bit younger (well one of those three might be a rooster).
I've read that some hens start laying around four months. So where are my eggs! Okay, I am impatient.
I am looking for anyway to kick start the process. We read that they need more daylight and calcium to lay eggs. Now that they are in their chicken tractor they are getting plenty of daylight (about 13 hours per day) and we are going to change their feed over to layer pellet for higher calcium.
Any other tips? I want to help these girls along and start the laying! We have Buff Orpingtons, Easter Eggers and Brown Leghorns. The younger three are Laced Wyandottes.
We are also needing to choose a material for their nests. Any recommendations?
Showing posts with label Setting Up. Show all posts
Showing posts with label Setting Up. Show all posts
Saturday, June 28, 2014

Saturday, June 21, 2014
Chicken Tractor Goes Live 6/21/14
Ams/_jTn8-0VE5k/s1600/WP_20140622_065.jpg" imageanchor="1" style="margin-left: 1em; margin-right: 1em;">
Our DIY Chicken Tractor

I won't pretend to be a master builder. I would have never been able to accomplish this quality of work without the generous guidance and assistance of my Uncle Scott. He also supplied a lot of the wood and other parts - and of course all the tools!
Bottom Enclosure
This is the frame of the bottom enclosure. On one end is a set of tires on a rod with a lever. When you flip the lever it jacks the coop up off the ground. Then you lift from the other side and easily wheel the tractor across the lawn. I can lift it by myself!


From the Bottom Up
Here you can see my very favorite part of the coop... the ramp! I'll go ahead and let you in on a secret, it is the only part of the coop that I made all by myself. The men did most of the heavy lifting. The ramp goes from the lower enclosure and up into the coop. At night we will lift the ramp and it will close off the upper coop to keep the hens safe from raccoons and other predators.
Upper Level
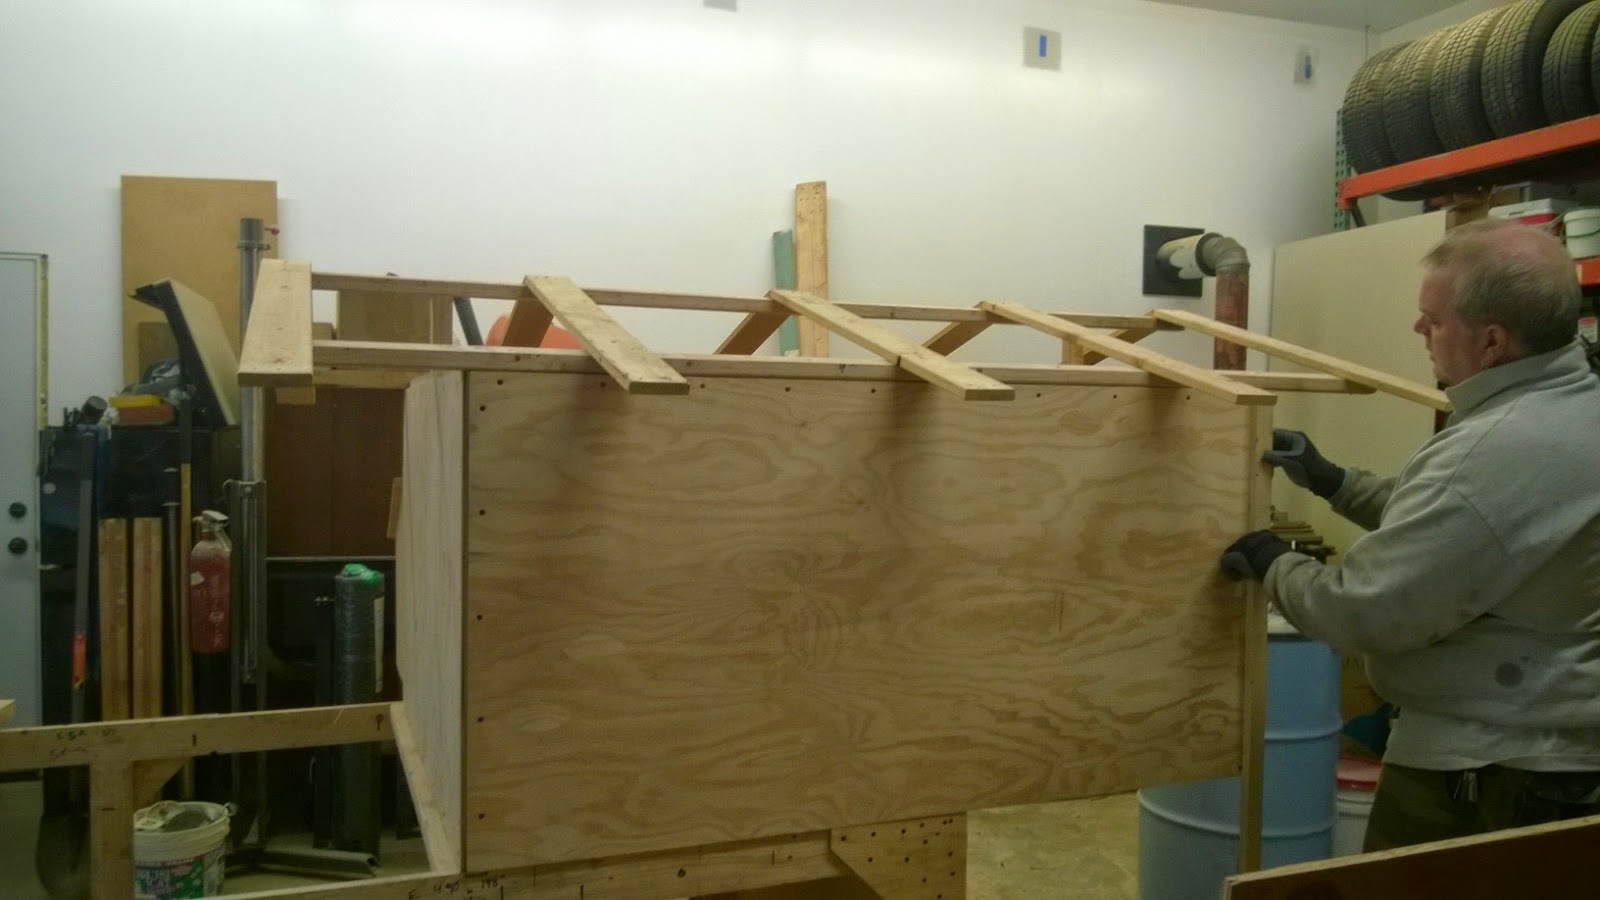
Here are some shots of the upper level of the coop. We put on a separate section for the nesting boxes with a lid so we can open it and easily access the eggs. Four nesting boxes should accommodate about 12 hens. We are building the coop for 10 hens so it should be plenty of space. We are installing a perch on the left side for them to roost on. You can see them installing the coop on the lower enclosure. They attached it at just enough point to make a solid sturdy structure but keep it easy to remove for transportation.



Painting
It turns out painting is hard work. This is where I helped out the most. Emjay and I painted for days! In order to waterproof the wood we put two coats of primer on before we even got to the colors. Scott had some primer that he let us use.

We painted it a pale green with a dark magenta trim. Two coats each time!


Roofing
We decided on plastic roofing with space left between the roof and the coop. We figured this would give the chickens plenty of ventilation, keep the rain and wind out, be easiest to clean and would keep the tractor from getting too heavy.


Fencing
We added plastic coated wiring to fence in the lower enclosure.

Doors
We decided to add two doors for the lower enclosure so that any part of it could be accessed. We went back and forth on where to put the door and finally decided making the whole top a door would give us the most flexibility.


Final Product
Finally, we added a PVC gravity feeder that we made out of PVC pieces and put their waterer we previously made for their old enclosure. We put bedding in their nesting boxes, moved it out to the grass and put the hens in!


Our goal was to get the hens in their chicken tractor by summer... and with perfect timing, we finished it on the first official day of summer!
Tuesday, March 11, 2014
Weekly Update (3/10/14) Week Two
Week Two
They've absolutely exploded in size, uniqueness, and personality. One easter egger is significantly larger than the rest of the hens, we think this may be a rooster. There are many chicks that aren't far behind. They are getting more and more pin feathers and with that is coming unique designs. We are able to tell almost every chicken apart. The chicks are much more coordinated now. They are using their wings to balance and run faster as well as jump onto and off of a box we put in their area.
One brown leghorn has developed a large stomach. She isn't acting lethargic or sick but has a larger stomach than the rest and we fear she may be malformed. This is the only possible health concern they have right now. Poopy butt is completely gone.
We spent a lot more time in the brooding room this week and the chicks are becoming more curious about our presence. Because we're past two weeks we are lowering the temperature again to 80 degress F and reducing the amount of grit we give them. We are planning on starting to give them treats but only handfed. We want the chickens to be friendly so we are handling and getting them used to us which is becoming easier now that they seem less afraid.
Planning
In about four weeks they should be ready to go outside. Before then we will let them outside for short periods of time under our supervision. We still have work to do on their new home including building a roosting area, filling the run with material, and building the laying boxes. We should be able to get this done by then no problem. We are hoping the weather permits us to do outside work to make the transition easier for us and them!
Wednesday, February 26, 2014
Special Delivery
Hatch Date passed
2/24, the chicks' hatch date has passed. Our newborn chicks are alive and on the way. eFowl is shipping them with 2-3 day USPS Poultry shipping which is usually comes in 1-2 days.
Here they are!
I got a call around 2pm from the local post office that there was "Some Live Poultry" waiting to be picked up. I hurried down to pick them up and the teller seemed almost as excited as I was. They came in a surprisingly small box, to keep them warm I assume. They would chirp like mad any time they were still. I could barely seem them through the breathing holes but I hurried home to take them out and get them set up in their new home.
I put them into their brooding area and they flocked out of the box and hid in the corner.


Calming down
After an hour or so they started to relax. I copied what I saw in a couple Youtube videos that suggested taking each chick and forcing them to eat and drink so they know where to eat. Although I'm not sure how essential it is I decided to go ahead and do it after they calmed down. After the first couple they all started to eat and drink on their own. They quickly follow eachother and have a true hive mind in their actions. They decide, "It's eating time, now!" or "It's time to hide in the corner." and they all follow.

Friday, February 21, 2014
Setting up the brooding area
More supplies
Not knowing what all we needed we stopped by a feed store nearby. They were very ready with all the answers and supplies at the front of the store. The associate there helped us to get the rest of the supplies including:
- Red Heat lamp
- Thermometer
- Chick boost - Sugar+Supplements for their water
- Chick starter - Grit for grinding down food
- 2x Liter feeders
- 1x Gallon waterer
- 10 sq ft wood shavings
Setting up
Once we got home we planned out the area and started setting up.
We layed a tarp down in an under-bed drawer area and filled it with the wood shavings
We filled water/chick starter mixture and made sure it would get room temperature.
We put a heater in the room to make sure we could part of the brooder to the required 90 degrees (and it did). Filled the feeders with 50/50 chick starter/feed.
We brought in cardboard that we will later use to make the walls of the brooder higher as it's only about 5-6" and less than that with the wood shavings.

Thursday, February 20, 2014
Ordering/Picking
Choosing our chicks
While choosing what breeds of chickens we wanted we were looking mainly for the egg production. We ended up going with the Easter Egger, Brown Leghorn, and Buff Orpington. This would give us Brown, White, and Green/Blue eggs. We had decided on having around 8 chicks and no roosters but needed to order 5 chicks per breed.
 |
Ordering our chicks
Ordering our chicks was easy enough. We decided to go with eFowl.com. Their website was nice and professional and everything was informative and easy to navigate and learn about each breed. We bought the chicks and also chick starter feed.
The hatch date is set for 2/24 and we are awaiting:
5x Easter Egger
Subscribe to:
Posts (Atom)